
The installation of indoor sports wood flooring is a complex process that requires careful planning and execution. Here is a step – by – step guide to the installation process:

- Site Preparation: The first step is to prepare the site by ensuring that the subfloor is level, dry, and free of any debris. Any irregularities in the subfloor should be corrected before installation.
- Subfloor Installation: A multi – layer subfloor system is typically installed to provide stability and shock – absorption. This may include a layer of plywood, a moisture barrier, and an underlayment.
- Wood Plank Layout: The wood planks or panels are then laid out according to the design and court dimensions. Precise measurements and alignment are crucial at this stage.
- Fastening: The wood planks are secured to the subfloor using nails, screws, or adhesives. The method of fastening depends on the type of wood and the installation requirements.
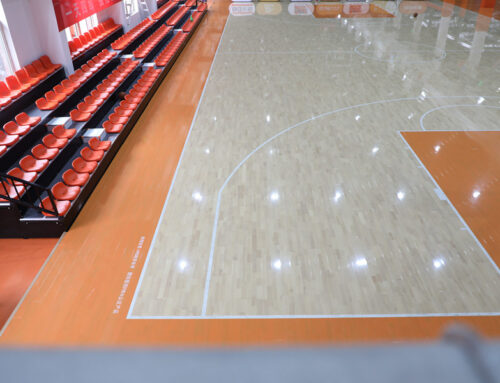
- Sanding and Finishing: Once the planks are installed, the floor is sanded to create a smooth surface. Then, a finish is applied to protect the wood and enhance its appearance. Multiple coats of finish may be required, with sanding between each coat.
- Court Marking: Finally, the court lines and markings are applied to the floor using paint or tape. This completes the installation process and makes the floor ready for use.


