
Okay, so I’ve been wanting to set up a decent volleyball area in my backyard for a while now. I finally decided to go for it, and let me tell you, it was a bit more involved than I initially thought! I wanted something that felt good to play on, could handle the weather, and was, you know, somewhat portable since I don’t want it to be a permanent fixture.
Planning and Picking Stuff
First, I had to figure out the size. I measured out a decent rectangle in the yard, making sure there was enough room around it for diving and, let’s be honest, sometimes missing the ball completely. I decided that, for our small group would a smaller-than-regulation court would do the trick.
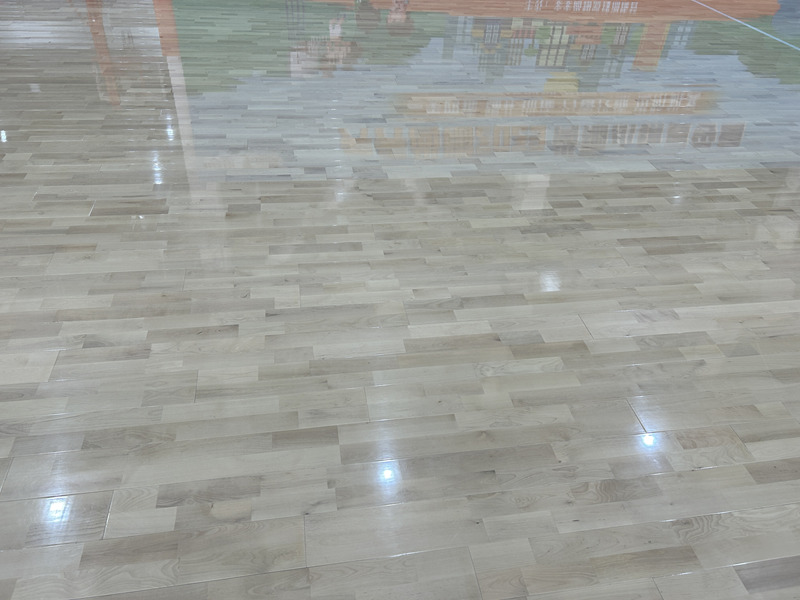
Then came the research. I spent a lot of time looking at different flooring options. I considered grass (too much upkeep), concrete (too hard on the knees), and those interlocking plastic tiles (seemed kinda flimsy). Eventually, I stumbled upon this idea of using wooden flooring with cushions, specifically larch, because I heard it’s pretty durable.
Getting My Hands Dirty (Literally)
I ordered a bunch of larch planks. I’m not gonna lie, seeing the pile of wood arrive was a little intimidating. I also got these rubber cushion things – they’re like little shock absorbers that go underneath the wood. The idea is to make the floor a bit bouncy and easier on the joints.
The first step was clearing the area. I pulled out weeds, raked the ground, and tried to make it as level as possible. This was probably the most boring part, to be honest.
Next, I started laying down the cushions. I spaced them out evenly, following a sort of grid pattern I’d sketched out. It felt a bit like putting together a giant, outdoor puzzle.
Building the Floor
Now for the wood! I started laying down the larch planks on top of the cushions. I rented a nail gun (best decision ever) and went to town. It was actually pretty satisfying to see the floor take shape. I had to cut some of the planks to fit at the edges, which was a bit of a pain, but I managed.
- Tip: Make sure you use screws or use outdoor-friendly nails, or these thing gonna rust faster,and leave yourself some small gaps between the planks – apparently, wood expands and contracts with the weather.
I kept checking to make sure everything was level as I went. I didn’t want any weird bumps or dips in the court.
The Finishing Touches
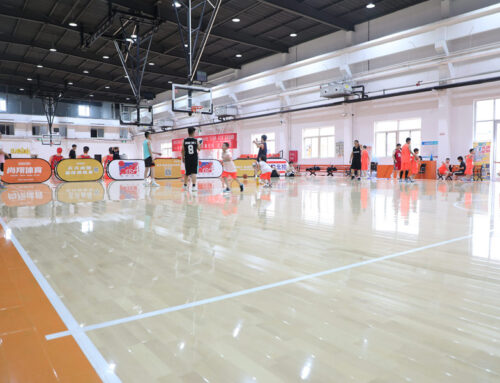
Once the flooring was down, I set up the net. And did a series of checks to see if everythings are fine.
We played our first game on it that weekend, and it was awesome! The floor felt great – firm but with a nice bit of give. It definitely beats playing on hard-packed dirt. And the best part? If I ever need to move it or store it for the winter, I can just disassemble the planks and cushions. It’s not exactly “easy,” but it’s definitely doable.
So, yeah, that’s my DIY volleyball court story. It was a bit of work, but totally worth it. Now, who’s up for a game?


