
Okay, here’s my blog post about installing batten volleyball engineer assembly wooden flooring:
Man, let me tell you, this weekend was a doozy. I decided to tackle that flooring project I’ve been putting off forever – putting down some engineered wood flooring in the basement, specifically designed for, get this, a volleyball practice area! Yeah, I know, a little ambitious, but my daughter’s obsessed, and I figured, why not?
Getting Started (and Feeling Overwhelmed)
First things first, I cleared out the entire space. It’s amazing how much junk accumulates in a basement! Then came the not-so-fun part: checking the concrete subfloor. I used a long straight edge (okay, it was a spare piece of lumber) to find any dips or humps. Luckily, the floor is relatively flat except one or two places that need a little fix.
The Batten System – It’s Like Legos for Grown-Ups!
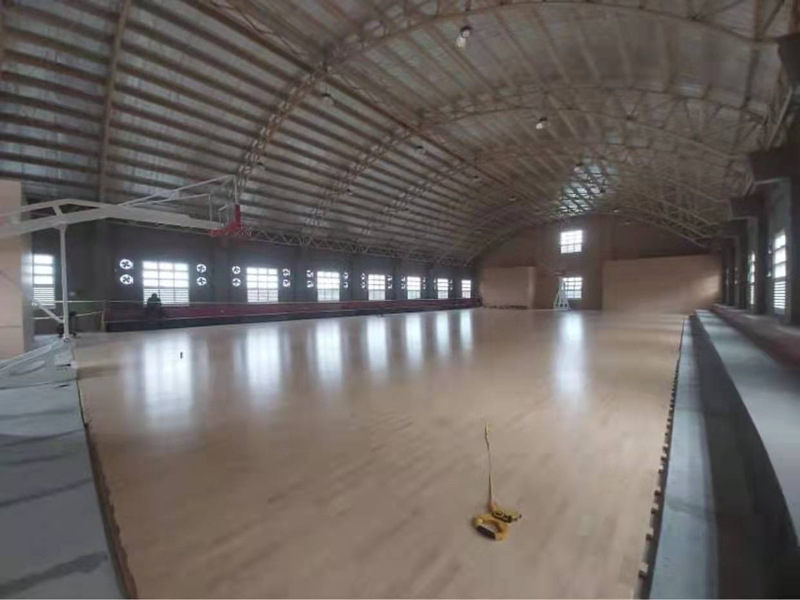
I opted for a “batten” system, sometimes they call it a “sleeper” system. Basically, it’s a grid of wooden strips (the battens) that you lay down on the subfloor. These create a space for airflow (gotta prevent moisture problems!) and also give the floor some bounce,which is good for a volleyball area.
The batten system feels like I am doing construction, but this makes the installation much easier.
I grabbed a bunch of 2x4s (pressure-treated, just in case of any dampness) and started cutting them to size. My trusty miter saw made quick work of that, although my ears were ringing for a while afterward.
Next, I laid down a vapor barrier – basically a big sheet of plastic – over the concrete. This is super important to keep moisture from seeping up into the wood. Then, I started arranging the battens. I went with a 16-inch spacing, which seemed to be the standard recommendation.
This part took some serious time. I used construction adhesive and concrete screws to secure the battens. Making sure everything was level and square was a real pain, I won’t lie. Lots of shimming with little wood scraps to get it just right. Measure, adjust, measure again… you get the idea.
Laying the Floor – Finally, Some Progress!
Once the batten grid was down, it was time for the actual flooring. Now, I did something I read about in a flooring manual. I applied some construction adhesive to the top edges of the battens before laying down the subfloor for extra grip. This is what I read:
- The maximum span for a batten should not exceed 400mm centre to centre, and 300mm for 15mm thick flooring.
- Ensure that when installing a batten system over a concrete slab, adequate moisture checks are completed, and a moisture barrier is installed.
- A minimum of 75mm clearance from the underside of the flooring to the ground.
The engineered wood planks went down pretty easily, thankfully. They click together, which is pretty satisfying. I used a tapping block and a rubber mallet to make sure everything was snug. It is like a puzzle but much more fun!
I made sure to stagger the joints – you know, so it looks like a real floor and not some weird grid. And I left a small expansion gap around the perimeter of the room. Wood expands and contracts with temperature changes, so you gotta give it some breathing room.
Finishing Touches (and a Sigh of Relief)
After all the planks were down, I installed some quarter-round molding around the edges to cover up that expansion gap. A little bit of caulking, some touch-up paint, and… boom! Done!
Honestly, it was a lot more work than I anticipated. My back is killing me, and I’m pretty sure I’ve got sawdust in every crevice of my body. But seeing my daughter’s face when she saw the finished product? Totally worth it. Now, if you’ll excuse me, I’m going to go soak in a hot tub for about three days.


