
Alright, gather ’round. Finally got that wood floor project for the local sports hall finished. What a journey. Gonna walk you through the whole mess, step by messy step.

Part One: That Demo Day Disaster
First things first, had to rip out the old junk. Showed up thinking “Yeah, tear it up!” Grabbed my crowbar, hammer, the usual demo crew. Started pulling up the old vinyl tiles. Boy, was I wrong. Some idiot glued them down like the world was ending tomorrow. Half came up in little pieces, the other half left sticky black crap everywhere. Spent hours just chipping and scraping. Arms were shaking, back already screaming. Worse, underneath? Concrete floor looking like the moon – cracks, bumps, old glue patches. Huge “oh crap” moment.
Part Two: The Concrete Nightmare
Couldn’t lay wood over that lunar landscape. Needed a smooth base. That meant grinding. Rented this massive, screaming concrete grinder. Dust? Forget dust masks, needed a spacesuit. That thing threw concrete powder everywhere. Place looked like a flour bomb went off. Had to cover vents, seal doors. Then spent ages vacuuming and mopping. Seriously, three passes just to see concrete again. Felt like cleaning up after a volcano. Still found dust in my ears days later.
Part Three: Wood Wrestling Match
Brought in the wood planks. Engineered maple, supposed to be tough for sports. Looked beautiful stacked up. Unrolling that squishy underlay felt good. Then… laying the first row. Sounds simple. Line it up straight? Hah! Took me forever with chalk lines, measuring every foot, triple-checking. Each plank was like wrestling a sleepy bear – heavy, awkward. The “click” system? More like “whack it hard until it maybe fits.” Bashed so many planks together, bruised my palm something fierce. Kept thinking “One more row.” Then found the wall wasn’t straight. Nearly cried. Had to trim weird angles, felt like butchering expensive furniture.
Part Four: The Midway Meltdown
Got halfway across the hall. Feeling kinda proud, kinda sweaty. Then walked back… and saw it. A dip. Like a little valley right down the middle where the concrete wasn’t perfect. Wood planks sagged when you stepped near ’em. Pure panic. Screwed down the nearby planks extra hard, hoping it’d pull tight. Nope. Started bubbling up. Seriously? Had to pry up like twenty planks – ruined the locking edges on some. Crawled under, shoved wood shims into the gap between the concrete and underlay to fill the dip. Re-laid those planks, sweaty, frustrated, muttering things best unsaid. Lesson? Flat concrete ain’t flat until YOU make it flat. Didn’t bother checking close enough.
Part Five: Screw the Finish Line
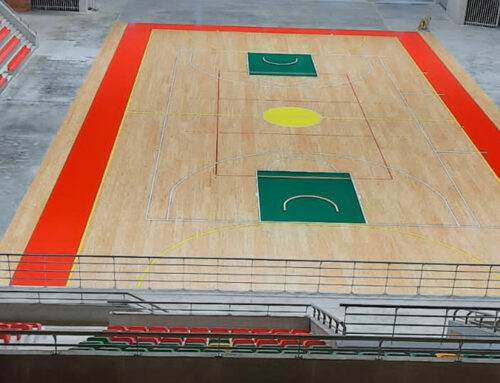
Finally got the last plank in. Victory dance? Nah, just wiped sweat off my forehead. But wait! Edges. Trim? Nah, needed those cool metal threshold strips. Measured the doorway, cut the strip. Simple? The screws were supposed to sink neatly… but hitting concrete underneath meant the screws either bent sideways or took forever to drill. Broke three screws, stripped one head. Swapped drill bits like a maniac. Got it down finally. Then… the final look. Ran my hand over it. Smooth, tight, golden wood shining. Exhausted, sore, but man… seeing that big empty hall with a perfect wood floor? Worth every swear word, every bruise, every lungful of concrete dust.
What went wrong & what stuck:
- Never, ever skip the concrete prep. Grind till your arms fall off.
- That “easy-click” flooring? LIES. Bring a rubber mallet and strong arms.
- Check for flatness every yard, not every ten. Shims are your desperate friends.
- Metal edging strips fight dirty. Have spare screws and drill bits.
- Beauty costs sweat. A lot of it. My back still hurts writing this.
Big project? Yeah. Done? Heck yeah. Never touching another wood plank for a month.


