
Okay, let me walk you through what I did with this basketball floor situation. We were looking at pine wood, you know, traditional look, but needed that bit of give, that cushion for playing. Wasn’t exactly a walk in the park, but we got there.

Getting the Stuff Together
First thing was getting the materials sorted. Went for pine flooring, tongue and groove stuff, seemed straightforward enough. The tricky part was the cushioning. We ended up getting these rubber pads, specifically designed to go underneath sports floors. Looked like a bunch of little black squares, basically. Had to make sure we got enough to cover the whole area, plus a bit extra just in case I messed up cutting.
Prepping the Base
Before anything else, the subfloor needed attention. It was concrete, pretty standard. Swept it clean, really clean. Then checked if it was level. Found a few low spots, so had to patch those up with some leveling compound. You really don’t want any bumps or dips under the wood, especially with the cushion system. Let that dry properly. Then rolled out a vapor barrier sheet, just some plastic sheeting, taped the seams. Gotta keep moisture away from the wood, right?
Putting Down the Cushions
Next up were those rubber pads. We started laying them out, row by row. They didn’t lock together or anything, just sat side-by-side. Had to be careful to keep them tight against each other, no gaps. Cutting them around the edges of the room was a bit fiddly. Used a utility knife, just scored and snapped them mostly. Took longer than I expected, making sure everything was perfectly covered and flat.
Laying the Pine Wood
Alright, the main event: the pine flooring. Started along the longest wall, like usual. Put down the first row, making sure it was dead straight. Used spacers against the wall for expansion. Here’s the thing with the cushions underneath – nailing was different. You couldn’t just bang away. We used a flooring nailer, but had to be more gentle, making sure the nails went into the subfloor through the cushion without compressing it too much or cracking the wood. The tongue and groove planks slotted together okay, mostly. Had a few boards that were slightly warped, always happens, just had to wrestle them into place. Tapping block and a mallet were my best friends here. Row after row, slowly covering the whole floor. It felt solid, but definitely had that slight spring when you walked on it even then.
Finishing Up
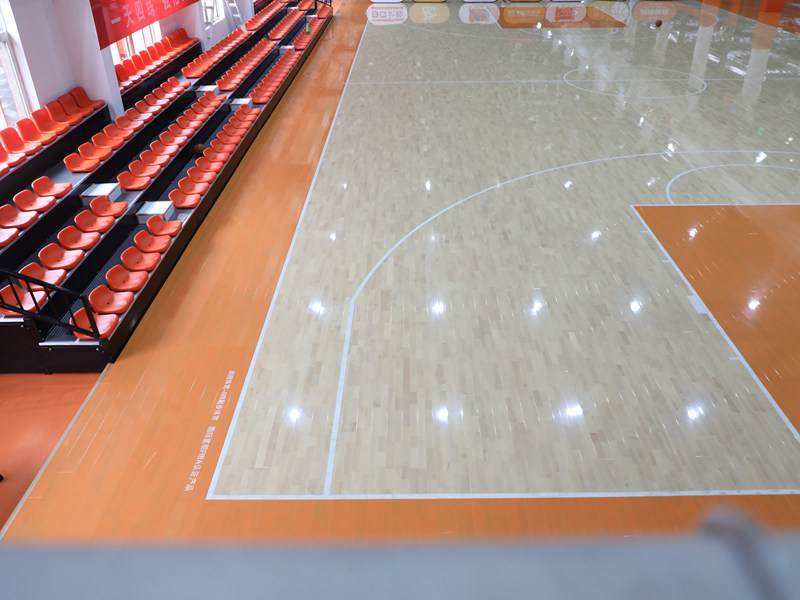
Once all the wood was down, removed the spacers. Installed the baseboards around the edges to cover the expansion gap. The pine was pre-finished, which saved a lot of hassle. If it wasn’t, sanding and sealing would have been next, a whole dusty messy job. We did have to paint the court lines though. Taped everything off carefully and applied the line paint. That really made it look like a proper basketball court.
So yeah, that was the process. It was quite a bit of work, getting the base right, laying the cushions carefully, and then the wood on top. But stepping onto it afterwards? Felt good. Got that nice pine look, but with the bounce you need for basketball. Definitely worth the effort, even if my knees were complaining by the end of it.


