
Alright folks, let’s get into how I tackled this shock-absorbing dance floor project in my basement rec room. Total game-changer, but man, the assembly? That was a journey.

Getting Started
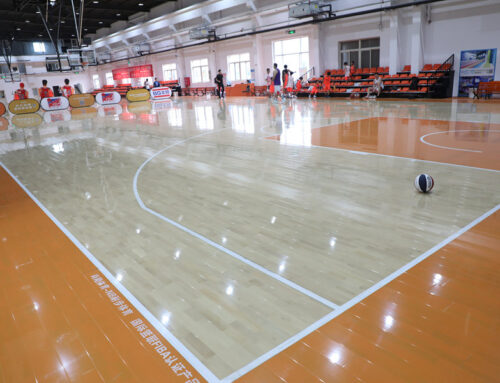
Saw these special maple flooring planks advertised online – supposed to be super forgiving for my clumsy two-left-feet dancing sessions. Ordered a big ol’ stack. Boxes showed up looking like they’d fought a bear, but everything inside seemed okay.
The Prep Work
First thing: had to clean out my whole basement space. Swept out what felt like ten years of dust bunnies. Then I rolled out this thick, kinda squishy foam layer the instructions said goes under the planks – felt like walking on a cloud already. Measured the room like, five times, ’cause I knew cutting mistakes would haunt me. Unpacked all those wood planks, let ’em sit inside for a whole weekend to settle. Basement smells like a lumberyard now.
The Actual Putting Together Part
Started in one corner, like they tell ya. First row, locking the planks together along the long edge. Felt satisfying when that little click happened. Getting the first row straight against the wall? Trickier than you’d think. Used some plastic spacers to keep a small gap around the edges – apparently wood likes to breathe or swell up a bit. Worked my way row by row from there.
Here’s where things got real:
- Locking Mechanism: Some planks clicked together easy-peasy. Others? Had to wiggle ’em, push down hard, sometimes gently persuade them with a rubber mallet. My knees complained loudly.
- Cutting Corners & Edges: My hand saw and I became very well acquainted. Measuring for those edge cuts around pipes and corners took focus. Made a couple goofs, had to recut a few pieces. Looks kinda ugly behind the couch now, but eh.
- Keeping it Flat: Had to keep checking with a long level. Found a couple of low spots halfway through. Pulled some planks apart where I needed to and nudged more foam underneath. Annoying, but necessary.
- The Foam Factor: That squishy under-layer made it weird to walk on while building. Felt unstable sometimes, which was kinda freaky. Trusted the process, I guess.
Almost Done (So Close!)
Once all the planks were down, it looked kinda messy with those gaps and uneven edges all around the room. Time for the trim pieces! Nailed in some nice baseboards to cover those expansion gaps – instantly looked a million times cleaner, like actual finished flooring.
The Big Test: Dancing!
Finished? Time to crank some tunes and bounce! The whole point, right? Jumped around. Did some terrible salsa steps. Even slammed my heels down a bit.
- Shock Absorption Verdict: Winner! That foam layer underneath makes a HUGE difference. Landed a jump and it felt noticeably softer than slamming onto concrete. Knees definitely approve.
- Solid Feel: Even with the softness underneath, the actual maple plank surface feels stable, not spongy. Good grip too.
- Sound? Much quieter stomping around down there. Not silent, mind you, but way better than before.
Final Thoughts?
Putting this floor in myself was work. Harder than just rolling out a rug, that’s for sure. Sweated buckets, messed up some cuts, talked sternly to a few stubborn planks. But seeing it done, and actually dancing on it without feeling like I’m destroying my joints? Totally worth the elbow grease. The wood looks real nice too, way better than old concrete. Would I do it again? Maybe… but only after my knees recover from all the kneeling!


