
Alright, let’s talk about putting in that keel volleyball solid assembled wooden flooring. It was a bigger project than I thought, but totally worth it in the end. I wanted that real, solid wood feel for the volleyball court, and after some digging, I went with this keel system.
Getting Started
>
First things first, I cleared out the entire area. This was no small feat, had to move a lot of stuff into storage. I wanted a completely blank canvas to work with. Next, I spent a good chunk of time inspecting the subfloor. It’s concrete, and luckily, it was pretty level. A few minor imperfections, but nothing a little self-leveling compound couldn’t fix. I made sure to fill in any cracks or divots, you know, gotta have a perfect base.
The Keel System
The keel system itself is interesting. It’s basically like a framework of these wooden supports. So, I laid out all the keel pieces according to the plan that came with the flooring. Took some time to double, even triple-check the spacing. Measurement is very important!
Once I was happy with the layout, I started securing the keels to the concrete. Used concrete screws for this, making sure they were nice and snug. I didn’t want any movement or shifting later on.
Laying the Floor
Now for the fun part, the actual flooring! These solid wood planks were beautiful, but also pretty heavy. I started in one corner, carefully placing the first plank onto the keels. Then, it was all about interlocking the planks together. They had this tongue and groove system, so they fit pretty snugly. A rubber mallet was my best friend here, gently tapping them into place. No forcing, just nice, firm taps.
As I moved across the floor, row by row, I made sure to stagger the joints. This makes the floor stronger and, you know, looks better, a random feel.
- Checked for level constantly.
- Used spacers between the flooring and the walls.
- Expansion gap important.
Finishing Up
After all the planks were down, I installed the baseboards around the perimeter. This covers up that expansion gap and gives it a nice, clean look. I chose a simple, white baseboard to match the walls.
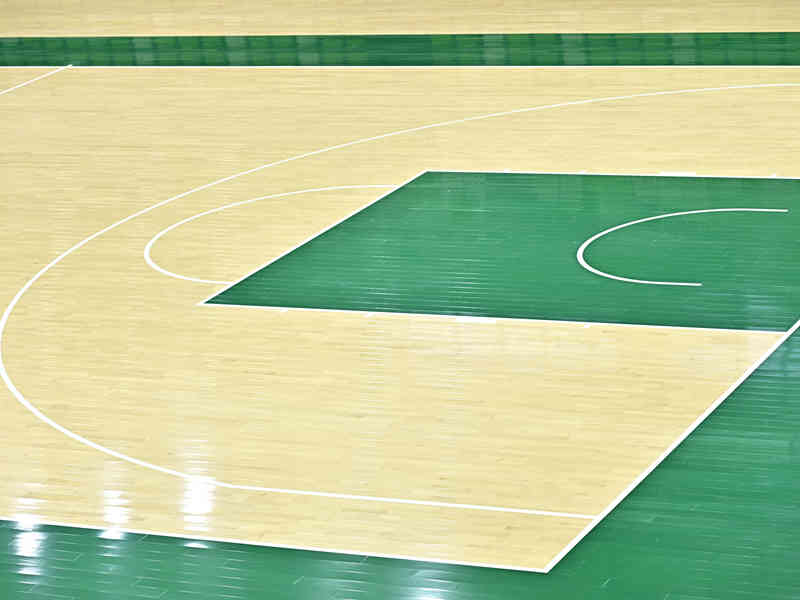
Finally, I took many photos to show off.
It took several days, working a few hours each day, but man, that finished floor looks amazing. Solid, sturdy, and ready for some serious volleyball action. It was hard work, but so satisfying to see it all come together.


