
Okay, let me walk you through how I got this basketball flooring set up. It was quite the project, but totally worth it in the end.
Getting Started – The Plan
So, I decided I wanted a proper surface for shooting hoops indoors, you know, something with a bit of give but still solid. After looking around, I settled on this specific type – solid assembly wooden flooring with built-in cushions. Sounded like just the ticket for a home court feel.
Prep Work is Key
First things first, the room needed clearing out completely. Everything out. Then, I gave the subfloor a really good sweep and vacuum. You don’t want any grit or bumps under your nice new floor. I checked if it was level-ish; thankfully, it was pretty good, no major dips or hills.
Then the delivery arrived. Boxes and boxes of wooden planks and the cushion underlayment stuff. Important step here – I opened up the boxes and let the wood sit in the room for a good couple of days. They say you gotta let it get used to the room’s temperature and humidity. Didn’t want any warping later on.
Laying Down the Base
Next up was the cushion layer. This stuff came in rolls. I just unrolled it across the floor, making sure the edges met up nicely. Used some special tape to join the seams so it formed one big cushioned sheet across the whole area. This is the part that gives it that slight bounce, good for the knees when playing basketball.
The Wood Assembly Begins
Now for the main event – the wooden flooring itself. These were proper solid wood pieces. I started along the longest wall, like the instructions suggested. Put down some little plastic spacers against the wall to leave an expansion gap – wood moves, you know?
The first row is super important to get straight. Took my time with that one. These planks had a kind of tongue-and-groove system, made for easy assembly. You angle the new piece, slot it into the one already laid, and then push it down flat. It sort of clicks or locks into place. It wasn’t always that easy, sometimes needed a bit of persuasion with a rubber mallet and a tapping block, but you get into a rhythm.
- Lining up the plank.
- Angling it into the groove.
- Tapping it snug and flat.
- Making sure there were no gaps.
Cutting and Fitting
Of course, you get to the end of a row, and the last piece is never the right size. So, out came the saw. Measured the gap, marked the plank, and made the cut. Had to do this for every row. Also needed to cut pieces to fit around a doorway, which took a bit more careful measuring and cutting.
Working row by row, staggering the joints so they don’t all line up, makes it look better and stronger too. It started to really look like a floor pretty quickly, which was encouraging.
Finishing Touches
Once all the main planks were down, I removed the spacers from around the edges. Then I installed the transition strips in the doorway and put baseboards back around the room to cover the expansion gap. Looks much neater that way.
Gave the whole floor a good clean-up, got rid of sawdust and footprints.
The Final Result
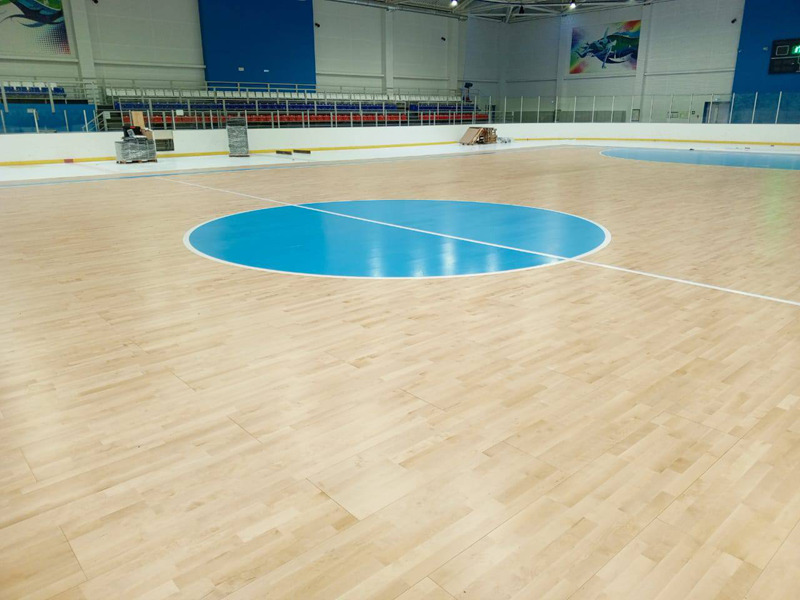
And there it was. My own little section of basketball court! The solid wood feels amazing underfoot, really sturdy. And you can definitely feel the effect of the cushions underneath – it’s not harsh like concrete, got a nice subtle give. Bouncing the ball sounds just right. Took some effort, quite a bit of kneeling and measuring, but seeing it all done? Yeah, really happy with how this wooden flooring assembly turned out.


