
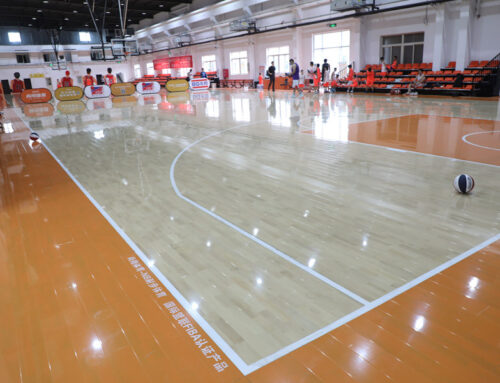
Alright folks, buckle up because today’s project was a doozy. Decided to finally tackle building that home basketball court in the garage, you know the one I’ve been hoarding parts for? Yeah, that pile of misery. Main goal: slam dunk the cushion flooring over rubber mats and those stupid tree-looking foam things, all on top of the wood subfloor panels. Sounded simple on the website, reality? Not so much.

The Great Unboxing Disaster
First step? Open the damn boxes. My knife slipped, of course, nicked the very first rubber shock pad. Cursed the universe for a solid minute. Laid out everything on the garage floor like a maniac’s treasure map: all the wooden panels (thank god they numbered ’em), those wrinkly brown shock pads, the cushion flooring rolls (heavier than a dead walrus), and the baggies filled with bolts and washers that looked suspiciously like leftovers from IKEA. Double-checked the list against the packing slip – surprise, surprise, I was missing two anchor bolts. Fantastic start.
Floor Prep Feels Like War
Garage floor was disgusting. Swept it like my life depended on it, got the big bits. Then mopped it twice – turned the water black. Didn’t realize how much oil leaked out of that old motorcycle. Kept wiping until the rags stopped coming up dirty. Let the floor dry completely. Seriously, no rushing this step unless you want your shock pads swimming.
Shock Pads Are Deceptively Tricky
Time for the rubber pads. Rolled the first one out, thought “Easy!”. Nope. Those things want to wrinkle like old skin. Had to fight it flat. Used heavy tools along the edges to weight it down so it wouldn’t curl back up like a scared woodlouse. Made sure the edges butted right up against each other with zero overlap – any lip and the wood panels over it would wobble like a drunk. Ended up taping the seams with this heavy-duty flooring tape I grabbed last-minute. Lifesaver.
Tree Foam Puzzle Madness
Then came the “rubber tree things” – little foam hexagons. Supposed to lock together to spread the impact load. Getting those first few to interlock was like herding cats with buttered paws. Fumbled, dropped them, got them turned around backwards – classic. Finally figured out the groove system. Got down on my hands and knees and hammered them together gently with a soft mallet. Once I got a groove going (ha!), it sped up. Covered the entire shock pad area with this foam forest. Knees were screaming.
Wood Panels: Measure Twice, Swear Once
Now the wooden subfloor panels. Started laying them tongue-side-in towards the wall like the dim diagram suggested. First row clicked together okay, needed a rubber mallet for a gentle persuasion. Used the level constantly. My garage floor wasn’t perfectly flat (whose is?), used those tiny plastic shims under the panel edges whenever it rocked. Had to unscrew one panel because I started the row crooked – only spotted it three panels in. Cue internal screaming. Slowly built out row by row, cutting the last piece in each row with a circular saw (ear protection ON, dust mask ON). Had to anchor the perimeter panels into the concrete every 18 inches. Borrowed a hammer drill – that thing is loud but eats concrete for breakfast.
The Cushion Floor Finale
The blue cushion flooring itself felt like victory was near. Unrolled it perpendicular to the wood panels underneath. Got my kid to help weigh down one end while I slowly pulled it taut at the other. Let it relax for a couple hours – apparently it “settles” from being rolled. Then, using double-sided flooring tape along the perimeter edges, pressed it down firmly. Trimmed the excess flush against the wall with a sharp utility knife. Sealed the seams with the recommended adhesive – just a thin bead, smoothed it down.
Did It Work? HELL YES.
Took like 6 hours start to finish (not counting beer breaks and lunch). Stepped onto the cushion floor, bounced the ball. Solid. Took a running jump and landed – knees thanked me immediately. The bounce felt legit, way better than bare concrete. Tired, sore, but honestly? Worth every ache. Got that sweet home court setup now.
Lessons Learned:
- Missing parts are guaranteed. Check everything immediately.
- Floor must be ABSOLUTELY clean and dry. Garbage will show through.
- Rubber mats fight back. Tape is your friend.
- Tree foam panels only go one way. Pay attention to the arrows.
- Level EVERY wood panel row. Starting crooked ruins everything.
- Let the cushion flooring relax. Don’t tape it down instantly.
- Hammer drill for anchors is non-negotiable. Hand drills will cry.
That’s it! Good luck if you try it yourselves. Bring patience. Lots of patience.


