
Alright, guys, let’s talk about my latest project – putting together a batten basketball birch assembled wooden floor. Sounds fancy, huh? It wasn’t as bad as I thought it would be, but definitely had its moments.
Getting Started
First things first, I cleared out the room. Everything. Furniture, rugs, the whole nine yards. This gave me a nice, empty space to work with. Then, I gave the existing floor a good sweep and mop. I wanted a super clean base to start with, no dust bunnies messing things up.
Laying the Foundation
Next up was the underlayment.I am very happy that I chose a good sound-proof and moisture-proof one. The underlayment I am using is a roll and I rolled it out across the floor, overlapping each row by a few * I use a knife to cut it * stuff is supposed to help with sound and moisture, which is important for a basketball court, even a small one.
After the underlay, i started to assemble the * is probably the trickiest * needs to be assembled very * it went pretty smoothly.
The Fun Part (Sort Of)
Now for the actual wood! I got these pre-assembled birch panels. They’re designed to click together, which sounded easy enough in theory. I started in one corner, laying down the first panel and then clicking the next one into * first few rows were a bit of a struggle, just getting the hang of how they fit together. I may used a rubber mallet to gently tap them into place, making sure everything was snug.
I kept going, row by row, clicking and tapping my way across the room. It was kinda like a giant puzzle. The key, I found, was to be patient. Sometimes a panel wouldn’t quite click in, and I’d have to fiddle with it a bit, maybe give it a little extra tap. But eventually, I got into a rhythm.
The Finishing Touches
Once all the panels were down, I installed the baseboards around the edges of the room. This covered up the gaps between the wood and the walls, making everything look nice and * the last step is installed transition strips.
All Done!
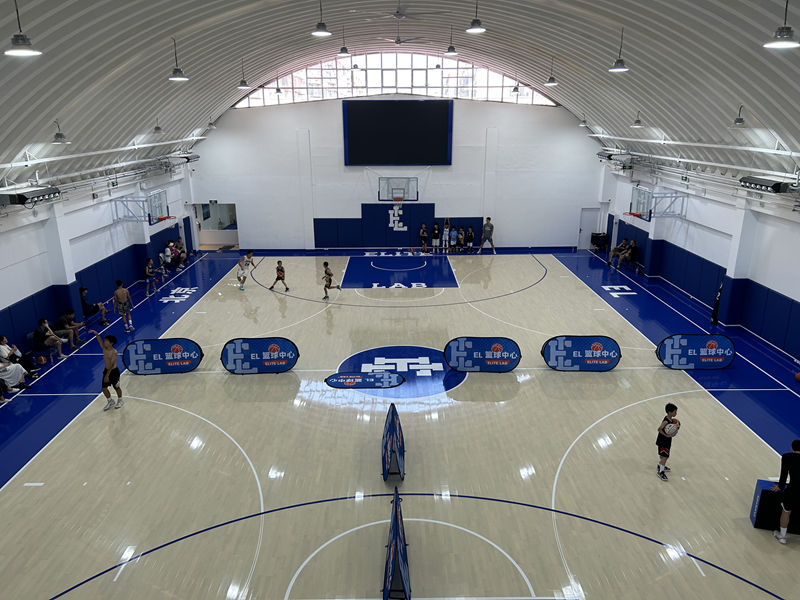
And that’s it! My very own batten basketball birch assembled wooden floor. It took a good chunk of time, and there were a few moments where I questioned my DIY abilities, but overall, I’m pretty stoked with how it turned out. Now, time to shoot some hoops!


