
Okay folks, let me walk you through this whole basketball court floor project I just wrapped up. Man, it was a journey, lemme tell ya. It all started when I looked at the old court at our local community center. Man, that thing was rough. More cracks than a dry riverbed, splinters hiding everywhere like little wood ninjas, and the bounce? Forget about it. Like throwing a ball on concrete. Something needed to change.

The “What Am I Doing?” Phase
First thing, I gotta figure out what I’m actually gonna replace it with. I knew nothing about gym floors, zero, zip, nada. Went down a rabbit hole online, let me tell you. Maple? Oak? Bamboo? Who knew there were so many choices? And the price tags? Man, seeing those numbers made my eyes water harder than cutting onions.
Then I read about the layers underneath – like shock pads and stuff? Apparently, it’s not just slapping wood down. People kept talking about “playability” and “impact absorption.” Fancy words for “doesn’t kill your knees.” I poked around forums, got confused, got frustrated. Ended up calling a couple of suppliers directly and just admitting, “Look, I’m just a guy trying to fix a court, help me out here.” Surprisingly, they were cool. Sent me samples.
Getting My Hands Dirty
Decision time. Went for a mid-range maple surface. Looked good, felt solid. Then came the demolition. Ripped out the old floor. That was pure muscle work. Crowbars, hammers, sweat dripping like Niagara Falls. Found more weird stuff under there than I care to remember – old gum wrappers, coins, a creepy-looking doll shoe… the works.
The Real Grind Starts
Had to make sure the concrete base underneath was smooth. Not just look smooth, but actually level. We’re talking laser levels, folks. Hours of scraping, grinding, filling holes. My back started singing songs I didn’t appreciate one bit.
- Step 1: Lay down the vapor barrier thingy. Like putting down a giant plastic tarp. Sounds easy? Took three of us two hours just to get it flat without wrinkles. Wind does not help.
- Step 2: Roll out the shock pad. This felt like dense foam. Had to cut it precisely around pillars and doorways. Tricky.
- Step 3: Tongue and groove panels. This is where it started looking like a floor. Clicking those panels together felt satisfying… at first. Then you hit a snag, a piece doesn’t quite fit. Had to trim some edges, muscle others in place. Swore more than a sailor on shore leave.
Left the boards to sit for a couple days, letting them get used to the room’s vibe. They call it “acclimating.” I called it letting them chill.
Sanding and Sealing – The Dust Apocalypse
Sanding day. Rented a beast of a floor sander. Turned that thing on and instantly created a dust cloud that would make a sandstorm jealous. Goggles, mask, heavy clothes – mandatory. It was hot, loud, and incredibly dusty. Did multiple passes, finer and finer grits. The floor finally started feeling smooth and looking consistent.
Then the sealant. That slippery stuff you see on professional courts? Yeah, polyurethane. Applied the first coat thin and even. Waited. Applied the second coat. Waited. Smelled strong enough to knock out a horse. Had to seal the place off completely.
Finally, painted the lines. Measured twice, taped carefully, rolled on the white paint. Peeling the tape back? Pure magic seeing those crisp lines appear.
Final Check: The Bounce Test
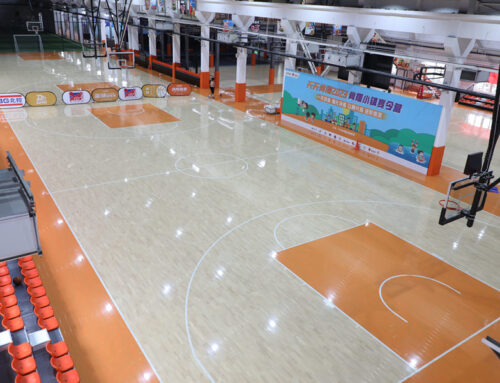
Let everything cure for ages. Finally, brought out the basketball. That first dribble? Man. The sound! That crisp, clean thump. The bounce was perfect. Even, responsive, springy. Jumped up and down myself. Felt like walking on a really supportive cloud.
Would I do it again? Honestly? Ask me in a month when my back stops complaining. It was way harder, messier, and more time-consuming than I ever dreamed. But man, seeing that new floor, hearing that perfect bounce… yeah, it feels good. Really good. Just hope those kids appreciate it!


