
Okay, here’s my attempt at writing a blog post in the style you requested, focusing on the “batten Volleyball soft maple assembled wooden flooring” project:
Alright, so I decided to tackle this flooring project. I’ve always wanted that classic, springy feel of a real wood sports floor, and I figured, “How hard could it be?” Turns out, it’s a bit more involved than slapping down some laminate.
Getting Started
First things first, I measured the area. Twice. Gotta make sure you don’t end up short, right? Then came the fun part – picking out the wood. I went with soft maple because I heard it’s got a good balance of durability and that nice, bright look. And “assembled”? That means the pieces came pre-cut and ready to interlock, which sounded way easier than cutting everything myself.
The Batten System
Now, this “batten” thing is what gives the floor its bounce. It’s basically a grid of wooden strips that goes underneath the main flooring. I laid down a vapor barrier first – gotta protect against moisture – then started arranging the battens. This was like a giant puzzle. I used some construction adhesive and screws to keep everything in place. Spacing is key here, so I followed the instructions that came with the flooring… mostly.
Laying the Floor
With the batten grid down, it was time for the actual flooring. This part was surprisingly satisfying. The maple pieces clicked together pretty easily, though I did use a rubber mallet and a tapping block to snug them up. You gotta make sure those seams are tight! I worked my way across the room, row by row, making sure to stagger the joints – you know, for that professional look.
- Measuring: Seriously, measure twice (or three times!).
- Vapor Barrier: Don’t skip this! Moisture is the enemy.
- Batten Grid: This is the foundation, so take your time.
- Clicking and Tapping: It’s like a giant, wooden jigsaw puzzle.
- Staggering Joints : Get creative with you floor.
The Finishing Touches
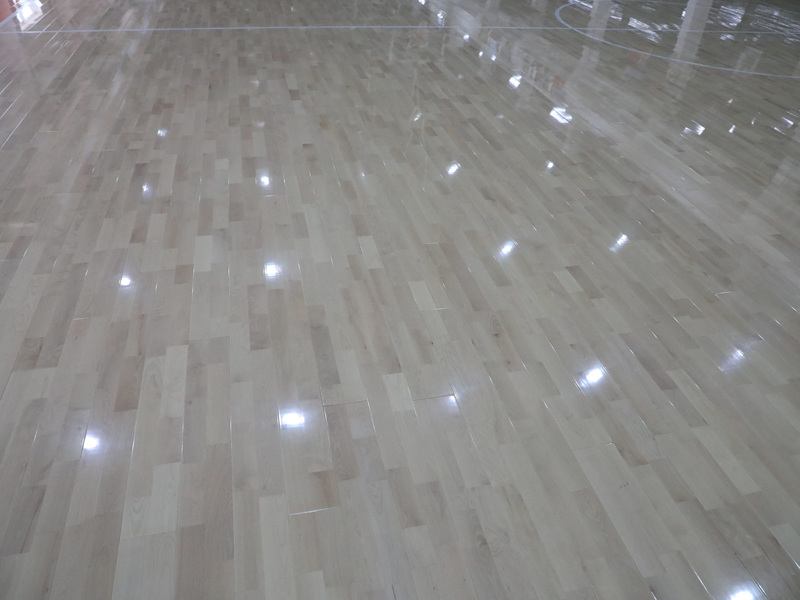
Once all the flooring was down, I installed some baseboards around the edges to cover the expansion gap (wood expands and contracts, you know). Then, I gave the whole thing a good sanding. There had to be a sanding. Last step: applying a few coats of polyurethane. This protects the wood and gives it that shiny, gym-floor finish. I went with a satin finish because I didn’t want it too glossy.
And that’s it! It took a few weekends, some sore muscles, and a few “learning experiences,” but I’ve got my own awesome wooden sports floor. Now, who’s up for a game of volleyball? I might be a little sore for the next few days, but the floor working amazing.


